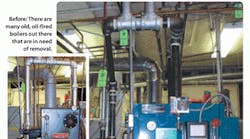
Converting an oil-fired boiler to a water-based system is a major home comfort project. A job well-done provides more livable space, and eliminates higher heating bills in times of skyrocketing oil prices.
Get Rid of That Oil Tank
In my opinion, an oil tank is an archaic method of heating a home that poses risks to the homeowner, as well as uncertain costs, in light of roller-coaster oil prices.
There is also considerable risk involved with a basement oil tank, largely due to human error. How many times have you heard of an oil tank that was overfilled, and spilled on the floor? My favorite story is when a tank became so loaded with sludge that the bottom fell out! After the clean-up, the customer was $25,000 poorer. That's an extreme case, and thankfully, it doesn't occur often.
The oil tank removal isn't complete until the oil vent and outside supply lines are removed. If the installer should forget to remove the lines, and the homeowner neglects to cancel the next oil delivery, the customer could have a pool of oil in their basement. (Scroll down to continue reading article.)
Chimney Liner Upgrade
Unless you're installing a high efficiency system that vents directly outside, all oil-to-gas conversions will need to be upgraded with chimney liners and make up air. This requirement has to be included in any quote you provide for an oil-to-gas conversion.
Steam Heating Installation
Preparation. The sales person will create the needed material list and give it to the warehouse manager who will assemble all the materials for the installer before the job.
-
The installer must check the estimated work folder to look for any special instructions and cautions.
-
Be aware that on every boiler job there will be a visit by the certified chimney inspector to verify the condition of the chimney liner.
-
Read the instruction sheet for the job and keep it close by for reference during the project.
-
The installer must be sure to enter the house through the correct door. This information will be in the estimated work folder.
-
Cover and protect the client's floors and staircases before moving any equipment in or out of the house.
-
The installer or apprentice organizes all the needed parts on the floor of the work area, taking note that nothing is missing.
Dismantling Old Equipment
-
Before removing the old boiler, the installer will tag the near-boiler piping, noting whether each pipe is a supply or return line. In addition, all wiring should be tagged and identified to assist the electrician on the new installation.
-
The installer will cut the old boiler from the piping. The boiler removal contractor will disassemble the existing boiler and remove it from the premises. At no time is the installer or the apprentice to be involved with the removal. This precaution prevents injuries to the installer or apprentice. A removal contractor is trained and paid to do the job.
-
The installer must take care when draining the system water. Try to have it cool, if possible. It is the system engineer's responsibility to ask the homeowner to shut off the emergency switch that fires the gas burner as early as possible on the morning of the installation.
Page 2 of 2
Important points to remember:
- Don't drain hot water into a toilet.
- Don't pump old system water onto a lawn, or flower bed.
- Don't pump old system water into a slop sink without first asking the client's permission.
- Flush the drainage area with fresh water after draining the system.
- Flush the wet return lines.
- Plastic bags and plastic sheets are available to reduce the spread of debris.
Setting the New Boiler
It's the installer's responsibility to ensure that either the boiler removal contractor or the apprentice has cleaned the area prior to the setting the new boiler in place.
The removal contractor, installer and/or apprentice will bring the new boiler into the boiler room. All boilers must be installed on top a 4-in. solid concrete block base.
If the basement floor is unable to support the weight of the new boiler or provide a level installation surface, a new concrete pad must be prepared before the boiler is installed. All boilers must be level and plumb through the use of steel shims only.
The installer will consider the flue pipe before connecting the piping side of the system. Use as few flue pipe fittings as possible. This is a must. Flue piping is normally the largest pipe and the last item to be installed, I urge you to install all vent piping first. You will avoid piping yourself into a corner.
Piping the New Boiler
The installer will install the near-boiler piping according to the boiler manufacturer's instructions.
- We pre-cut all supply piping and Hartford loop piping to save time and improve efficiency on the job. (A Hartford Loop is an arrangement of piping between a steam boiler's header and its gravity-return piping). I strongly recommend following the manufacturer drawings inside the owner's manual.
- Pipe the skim tapping with a nipple and valve. Use Teflon tape and pipe compound for these connections.
- Anytime that an existing pipe needs to be cutout wicking must be used on the new thread in addition to the Teflon and pipe compound.
- Never insert an old bushing into an old fitting. This will lead to a leak.
- All boilers shall be piped in steel, never copper. Over time copper piping will expand and contract greatly and will inevitably leak.
- Build the manifold. The “near boiler” piping is simply that. This is the piping that rises from the system and connects to the existing house supply and return piping.
- Install the 2-in. vertical piping for the supply. The minimum size length is 18-in.
- Install a 2-in. swing joint. This will allow the main to be pitched in the downward position, and allow condensate to return the heating boiler.
- Install a full size tee to the house supply. Lay the tee on its side and connect to the main supply with a full size elbow and union.
- Continue on the run to the Hartford loop and return piping.
- Setting the tee for the equalizer needs to be done with care. Always refer to the manufacturer's instructions. For this example use the shop drawing.
- The tee sizing is crucial, especially when there are two returns. The return piping unions should always be connected above the water line.
- Always change the main line vents. The main line vents are usually located at the end of the return piping. It's important that these vents be replaced due to age and rust build up.
- Feed the water supply through the return. This method allows cold water to feed trough hot return water and will allow it to temper. Never put cold water into the top of a steam system it could “shock” the system and crack a section. See the diagram below.
- Piping a skim set-up is an important step that's often overlooked. Our work involves threading pipe with oil. The boilers we're installing were stored outside with a nice coating of oil within for protection against weather. Somehow we need to get this oil out. A skim set up needs to be placed above the water line and below the top of a section.
The best visual I can give you is to imagine filling a glass upside down. If you fill the glass in this manner the water and whatever floats on top will stick to the roof of the glass. We don't want that, we want the stuff on the top of the water in this case oil to be skimmed off. If we installed a pipe below the roof of the boiler
Cleaning Procedure
Before installing the near-boiler piping, wipe off as much cutting oil as possible with a rag. All steam boilers must be skimmed and thoroughly cleaned after installation.
Do not add any chemicals to the boiler unless a systems engineer specifies them.
Operating Pressure
Set all steam heating boilers to cut-in at 1/2 psi and to cut-out at the lowest pressure possible to get steam to the furthest radiator.
If the air vents are working properly, most steam heating systems will work well with a maximum cut-out pressure of 1-1/2 psi.
Note: Burnham steam boilers now come with a distinctive Pressuretrol that requires a cut-in setting of 2 psi and a differential setting of 2 psi.
Timothy Flynn is CEO of Winters Company, a home services organization based in Cambridge, MA. Winters Company specializes in HVAC service and installations, and kitchen and bath remodeling projects. Winters Company is a member of Nexstar, and a recipient of the Frank J. Blau Financial Award. Flynn is willing to talk about improving sales or new services with any interested contractor. He can be reached at [email protected] or 617/765-4876. Steam boiler installation procedures co-written by Al Levi.


