By Patrick O’Donnell
Some HVACR contractors haven’t discovered refrigeration sealants, because they only came on the market five years ago. LoneStar service contracting company has had great success using them to stop leaks in systems where leaks are inaccessible or too expensive to fix.
In fact, we’ve applied sealants successfully to more than 100 systems in just four years, without any failure to system components. Our customers like the fact that we’ve reduced their bill from possibly hundreds or thousands of dollars in component replacement, down to a $150 injection charge plus refrigerant costs.
I like to use sealants because, instead of tying up a service crew or myself for a day or two to replace an evaporator coil in a walk-in freezer, we’re in and out of the job faster, on to the next job, and the client is undoubtedly happy with the result.
We specialize in restaurants and food service equipment, and have used sealants on a variety of equipment, including small refrigerators, commercial refrigerators, rooftop packaged air conditioning units, air conditioning split systems, walk-in coolers and freezers, reach-in coolers, and ice makers.
Applying sealants isn’t difficult, but there are several steps and procedures that should be followed to guarantee success.
Finding the Leak
We always try to find the leak first and fix it conventionally with brazing, if it’s accessible and the estimated cost is economically feasible for the client. We use the same arsenal of leak detection tools as any other company such as visible/audible inspections for oil residue, electronic sniffers, dye and UV lights, etc. If we find the leak, we either fix it, or if it looks like a lengthy project, we give the client a choice of repairing it conventionally or putting in a sealant, the latter which typically reduces the service cost substantially. Rather than run up a huge bill searching for the leak after a quick look is unsuccessful, we approach the client and suggest sealing the system. Obviously, a newer system might warrant component replacement, especially if the replacement costs are included in the original manufacturer’s warranty.
Preparing the System
If the client chooses to go with the sealant program, we prepare the system for sealing. It’s important to know how sealants work, because moisture control is a big factor in their application.
I’ve met several service technicians that falsely think HVACR sealants are like automotive radiator sealers that actually clog up a radiator hole, similar to floating debris that dams a river. Today’s high tech HVACR sealants are totally different and much more scientific than that. They’re a patented formula of organosilanes that remain a liquid along with the oil once they’re injected into a system. The sealant can remain a free-flowing liquid for years in the system without any adverse effects to the compressor, expansion valves, or capillary tubes. Once the sealant exits a leak hole however, it reacts with moisture in the atmosphere outside the system and crystalizes around the hole to form a strong bond. This is very similar to how the human body’s blood naturally coagulates around a wound to form a scab.
Because of the chemical reaction when exposed to moisture, the system should be moisture-free. Sealant manufacturers recommend recovering the refrigerant and performing a triple evacuation down to 30 microns to boil off any residual moisture in the system. It’s a good idea to use a micron gauge rather than conventional refrigeration gauges, because the micron gauge provides a much more precise reading.
Sealants probably won’t work on systems with a large hole. Sealant manufacturers recommend holes of 300 microns (about the diameter of a human hair) and smaller for the sealant to work successfully. The only time the sealant didn’t work for me was attempting to seal a hole that was too large.
Since the system is down for repair, changing the filter/drier(s) should also be done to give the system a fresh start.
While it’s recommended to assure moisture is removed, there have been several times I’ll skip that step and simply apply the sealant while topping off the system. Typically, these are long- time customers with systems I’ve maintained for years, and my familiarity with the system just tells me there’s little chance any moisture has infiltrated the system.
Applying the Sealant
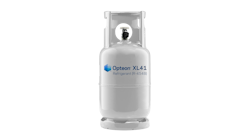
Once the system is prepared and charged with refrigerant, be sure to choose the right type of sealant at your distributor. Sealants come in three varieties based on system size — less than 1.5 tons; between 1.5 and 5 tons; and more than 5 tons.
The sealants come with a free charging hose, which should be used and discarded afterward. Used connecting hoses can have contaminants that will clog the tiny orifice in the hose. I learned this the hard way once by using an old hose where the orifice got bonded by the sealant because moisture had gotten into it.
Once connected to the low side Schrader valve, purge the hose slightly while connecting to the sealant can. HVACR sealant cans are vacuum packed, so once connected, the system refrigerant rushes into the can. It should take about 10 minutes for the can and the system pressures to equalize. It’ll take a bit longer on hot days.
Once the can has emptied, turn the system on for full circulation. The sealing process can take a few minutes, or it could take a day or two. Several times I’ve actually visibly seen a hole being sealed. It’s probably a good idea to follow up to check the system in a week or so. In the rare case in which it doesn’t work, we follow up with another sealant application, or a different strategy, because the hole is evidently too large.
Unless it’s depleted by the first leak, the sealant typically stays in the system indefinitely, and immediately seals future leaks as they occur. Some contractors feel they’re losing business that way, but I think it helps even out our workload. We also don’t fall behind because of time-consuming component replacements that could tie up a crew for a day or two.
Guarantee the Work
I always give a client the choice of using a sealant for a flat fee of $150 injection charge plus refrigerant or fixing the system conventionally, the latter pg which is typically a higher cost. I guarantee the sealant application, so many customers feel comfortable choosing it. If the system still leaks after 30 days, I refund half of the $150 and fix the leak conventionally.
Many of my long time customers trust us, and expect a good price and successful results. In addition, new clients become believers in our service, once we end the perpetual topping off of leaking systems every few months
