


As the heat of summer bears down on many parts of the country, a new opportunity presents itself. Hot weather conditions become ideal for duct temperature diagnostics testing that identifies the amount of cooling lost through ducts. Let’s look at how you can measure and calculate the percent of cooling lost in just a few minutes.
When temperatures are unusually hot or cold, this duct performance test provides the information necessary to solve many otherwise hopeless cases. This test isolates the effect ducts have on a system. If you take the time to study it carefully and then implement it, the test can be a valuable weapon in your installation, service, and sales arsenal.
What Does A Duct Temperature Diagnostics Test Identify?
Involving your customers in field testing their HVAC system is the best way possible to help them discover why their HVAC system is performing poorly. Then, the more your competitors fail to diagnose this problem, the greater the odds you have of getting the job.

How to Do This Test
The most dramatic time of day to offer this test is during the heat of the afternoon, when conditions are the worst and your customers need cooling the most. Or, if you’re testing in winter months, measure in the morning when the weather is the coldest and heating is needed the most.
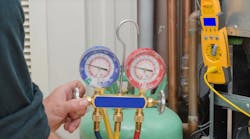
Step One – Measure the equipment temperature change. If it’s hot outside, the system should be running when you arrive at the home. With the system in full operation, measure and record the dry bulb temperature entering and exiting the equipment. Then subtract to find the temperature change through the equipment.
Example: The entering equipment temperature measures 76.2F and the exiting equipment temperature measures 56.2F. Subtract 76.2 from 56.2. The result equals an equipment temperature change of 20.0F.
Step Two - Measure system temperature change at the grilles and registers. If it’s hot outside, the system should be running when you arrive at the home. With the system in full operation, measure and record the dry bulb temperature entering the typical return grille and the typical supply register. Then subtract to find the temperature change between the supply and return grilles which is the system temperature change of the system that actually makes it into the building.
Example: The typical return grille air temperature measures 81.4F and the typical supply register air temperature measures 66.4F. Subtract 78.4 from 66.4. The result equals a system temperature change into the building of 12.0F.
Step Three – Calculate the percent of cooling being delivered into the building. Do this (Please, involve your customers in this discovery step) by dividing the system temperature (at the grilles and registers) by the temperature change through the equipment. The result is the percentage of cooling made by the HVAC equipment that is delivered into the building.
Example: Divide the temperature change of the system (12.0F) by the temperature change through the HVAC equipment (20.0F). Or, 12.0/20.0 = 60%. The answer is the percent of cooling being delivered into the building.
With some customers, you can stop the test right here and start answering their questions. You can talk about how you can fix this nasty unseen problem that they may have been living with for years.
Step Four – Calculate the percent of cooling lost through the duct system. Subtract the percent of cooling being delivered into the building (found in Step Three) from 100%.
Example: Subtract the percent of cooling that is being delivered into the building (60%) from 100%. This looks like: 100% - 60% = 40%. Or, 40% of the cooling produced by the HVAC equipment is being lost through the duct system.
Step Five – Go one step further and convert the percent of duct cooling loss into tonnage. This is done by multiplying the tons of the system by the percent of cooling lost through the duct system.
Example: Assuming a 3-ton cooling system, multiply the 3-ton system by the 40% duct loss (found in Step Four). 3 tons x 40% = a 1.2 ton-duct cooling loss.
One last example: You can also multiply the 3 tons of cooling by the 60% cooling delivered into the building (found in Step Three) In other words, a 3-ton system at 60% turns into a 1.8-ton system.
The New Solution
Measure and test the performance of the entire HVAC system. Servicing equipment alone doesn’t cut it anymore. As you have seen, with a few temperature measurements and calculations, you can catapult ahead of the rest of the industry.
You can finally help your customers understand their uncomfortable system and open their minds to new comfort and efficiency opportunities.
Rob “Doc” Falke serves the industry as president of National Comfort Institute, Inc., an HVAC-based training company and membership organization. If you're an HVAC contractor or technician interested in a free Temperature Diagnostic Procedure, contact Doc at [email protected] or call him at 800-633-7058. Go to NCI’s website at nationalcomfortinstitute.com for free information, articles, and downloads.