How to Prepare to Balance a Water System
Your speed and accuracy when balancing a water system, depends on how you prepare before you begin the testing, adjusting, and balancing portion of the work. Let’s take a look at several steps you can take to assure a quick and effective water balance job for a light-duty system.
This preparation, if completed before you get to the job site, may reduce your time in the field as much as 50%. These tasks consist of preparing reports, gathering specifications, tools, and inspecting the system before testing, adjusting, and balancing begins.
Gather Plans and Specifications
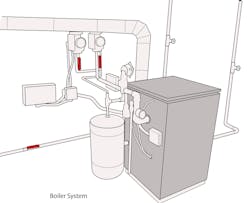
System plans should have a piping schematic that shows its location in the building. You can highlight and identify the pump location, water heating or cooling equipment, any air-moving apparatus, coils, radiators, or other terminal devices. Each piece of equipment should be marked with a designation that links it to the nameplate information and test data in the balancing report.
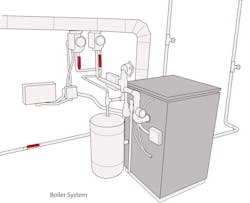
Locate each balancing valve on the schematic and number them in the order in which you plan to test and adjust them. Look for and identify all system components, so you’re familiar with their location once you’re on the job.
Be sure you have the pump curve matching the system pump. You’ll use this valuable information to plot pump flow using the pump pressure you measure in the field.
Record the manufacturer and model number of each piece of equipment and balancing valve. Ideally, you’ll have the project submittals. These include specifications, engineering data, pump curves, control sequencing, and start-up instructions. If no submittals are available, you’ll need to collect equipment information once you’re on site. Sometimes, no plans or specifications exist. In those cases, you’ll need to reverse engineer the system to find the correct values to balance the system to.
Each valve manufacturer provides a wheel or slide rule containing reference points you use to interpret water flow, in gallons per minute (gpm), through a valve. Once in the field, measure the pressure change through each valve and use the pressure and valve setting to lookup flow through the valve on the wheel.
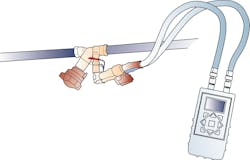
Other methods to determine gpm include using certain hydro manometers with built-in databases that interpret valve pressure and read water flow directly. You can also use the published Cv factors to calculate gpm using the measured valve pressure.
Enter Design Data into Balancing Reports
With the job plans and specifications in hand, enter the known design information into the balancing report. This includes all specified flows, pressures, and other design parameters. Also, enter the customer, job name, location, system name, and equipment information.
With this information captured, you’ll have full knowledge of what you need to do as you face each system component on the job. This will save many hours and make for quick and easy system balancing.
Before leaving the shop, verify the system installation is 100% complete. Assure you have full access to the system, it has been started, and that other trades have completed their work. If the water system has air-moving equipment, it should be balanced beforethe water side.
As you load your service truck, be sure you have all the test instruments needed and that your batteries are fresh.
Inspect the System Before Balancing
Once on site, with marked plans, engineering data, and partially completed reports in hand, walk the system and verify that it was installed according to plans and specifications. Assure all components are installed correctly and that all balancing valves and equipment is accessible.
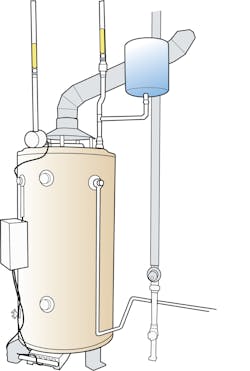
Go to the highest point in the system and pop the air bleeder valve to be certain there is no air in the system. Inspect to be sure the strainer (water filter) has been cleaned and the piping is free from construction debris. Observe the pump to assure it is rotating in the right direction.
Manipulate the controls by changing set points to verify the system responds as it should. Check the manufacturer and model numbers of the system components and make corrections on the reports. Be sure to record serial numbers.
Then start the system and listen for unusual noises in the equipment and fluid. Observe its operation and make notes of any deficiencies you find.
If all systems are a go, it’s finally time to begin testing and balancing. This may feel like way too much work to do before you balance, but you’ll soon see your preparation pays big dividends.
Experience proves taking this approach in a sequential manner, before you begin balancing, avoids many delays. It assures the dozens of diagnostic and troubleshooting decisions you make while balancing a hydronic system are based on solid knowledge gained by following these steps.
Rob “Doc” Falke serves the industry as president of National Comfort Institute, Inc., an HVAC-based training company and membership organization. If you're an HVAC contractor or technician interested in a free test procedure describing how to measure pump flow, contact Doc at [email protected] call him at 800-633-7058. Go to NCI’s website at nationalcomfortinstitute.com for free information, articles, and downloads.
About the Author
Rob 'Doc' Falke
President
Rob “Doc” Falke serves the industry as president of National Comfort Institute an HVAC-based training company and membership organization. If you're an HVAC contractor or technician interested in a building pressure measurement procedure, contact Doc at [email protected] or call him at 800-633-7058. Go to NCI’s website at NationalComfortInstitute.com for free information, articles and downloads.